
Anki Controller Setup: Full Gamepad Control with Contanki (2026)
1898790263, works with Xbox, PlayStation, Switch Pro and 8BitDo pads, no keyboard-mapping software needed. On iPhone/iPad, Contanki doesn't run; you put the controller in Keyboard Mode and let an app forward the presses — the Guru Anki Remote does this for the small 8BitDo models with nothing configured on the Mac.
Reviewing Anki with a controller is the single easiest way to make spaced repetition sustainable: your hands stay off the keyboard, you can lean back, walk on a treadmill, or grind cards one-handed on the couch. But "how do I use a controller with Anki" has two completely different answers depending on where you review, and most guides only cover one. This one covers both, then gets into the real setup and the problems people actually hit.
The two methods (pick the right one first)
| Contanki (desktop add-on) | Keyboard Mode (works on iPhone/iPad too) | |
|---|---|---|
| Where it runs | Anki Desktop only (Win/Mac/Linux) | Any device that reads a Bluetooth keyboard |
| How it works | Reads the gamepad directly via the browser Gamepad API | Controller pretends to be a keyboard; keys map to Anki shortcuts |
| Setup | Install add-on, press a button | Flip controller to Keyboard Mode, pair over Bluetooth |
| Extra software | None | None on desktop; on iPhone, an app that forwards keys |
| Best for | Full control (mouse, menus, per-screen mappings) | Reviewing on iPhone/iPad, or the cheap 8BitDo pads |
If you review on a computer, use Contanki — it's the richer, native path. If you review on an iPhone or iPad, skip to Reviewing on iPhone. The rest of this section is Contanki.
Installing Contanki (about 5 minutes)
Contanki is a free, open-source add-on. Two requirements before you start:
- Anki 2.1.66 or newer. Contanki uses toolkit changes that only exist from 2.1.66 on. (Older Anki? The GitHub releases page keeps builds back to 2.1.45.)
- A controller, connected by USB or Bluetooth.
Then:
- In Anki, open Tools → Add-ons → Get Add-ons…
- Paste the install code
1898790263and hit OK. - Restart Anki when it prompts you.
- Plug in or pair your controller and press any button — Contanki wakes up and shows an on-screen overlay of the current bindings.
Which controller should you buy?
Contanki works with any recent first-party Xbox or PlayStation controller out of the box, plus Nintendo and the pocket-sized 8BitDo pads the medical-school Anki crowd made popular. These are the ones confirmed to work:
| Controller | Feel for review | Notes |
|---|---|---|
| 8BitDo Zero 2 | Keychain-tiny, one-handed | The classic cheap Anki pad (~$20). Cramped but pocketable. |
| 8BitDo Micro | Small, comfier buttons | Has a dedicated Keyboard Mode switch — handy for the iPhone route. |
| 8BitDo Lite 2 / Pro / Ultimate | Full-size, comfortable | Best if you also game; more expensive. |
| DualShock 4 (PS4) | Full-size | Confirmed working; likely already in a drawer. |
| Switch Pro Controller | Full-size | Works well; single Joy-Con support too (dual planned). |
For pure review you don't need many buttons — four face buttons for Again / Hard / Good / Easy plus one for Show Answer is enough. That's why the tiny Zero 2 is so popular: it does everything a review session needs and disappears into a pocket.
Mapping buttons for review-only
Out of the box Contanki's defaults are built for full navigation, not just grading:
- Left stick — scroll and move between views
- Right stick — moves and clicks the mouse (inside the Anki window only)
- Right trigger — opens the quick-select menu (up to 8 actions) and shows the current bindings
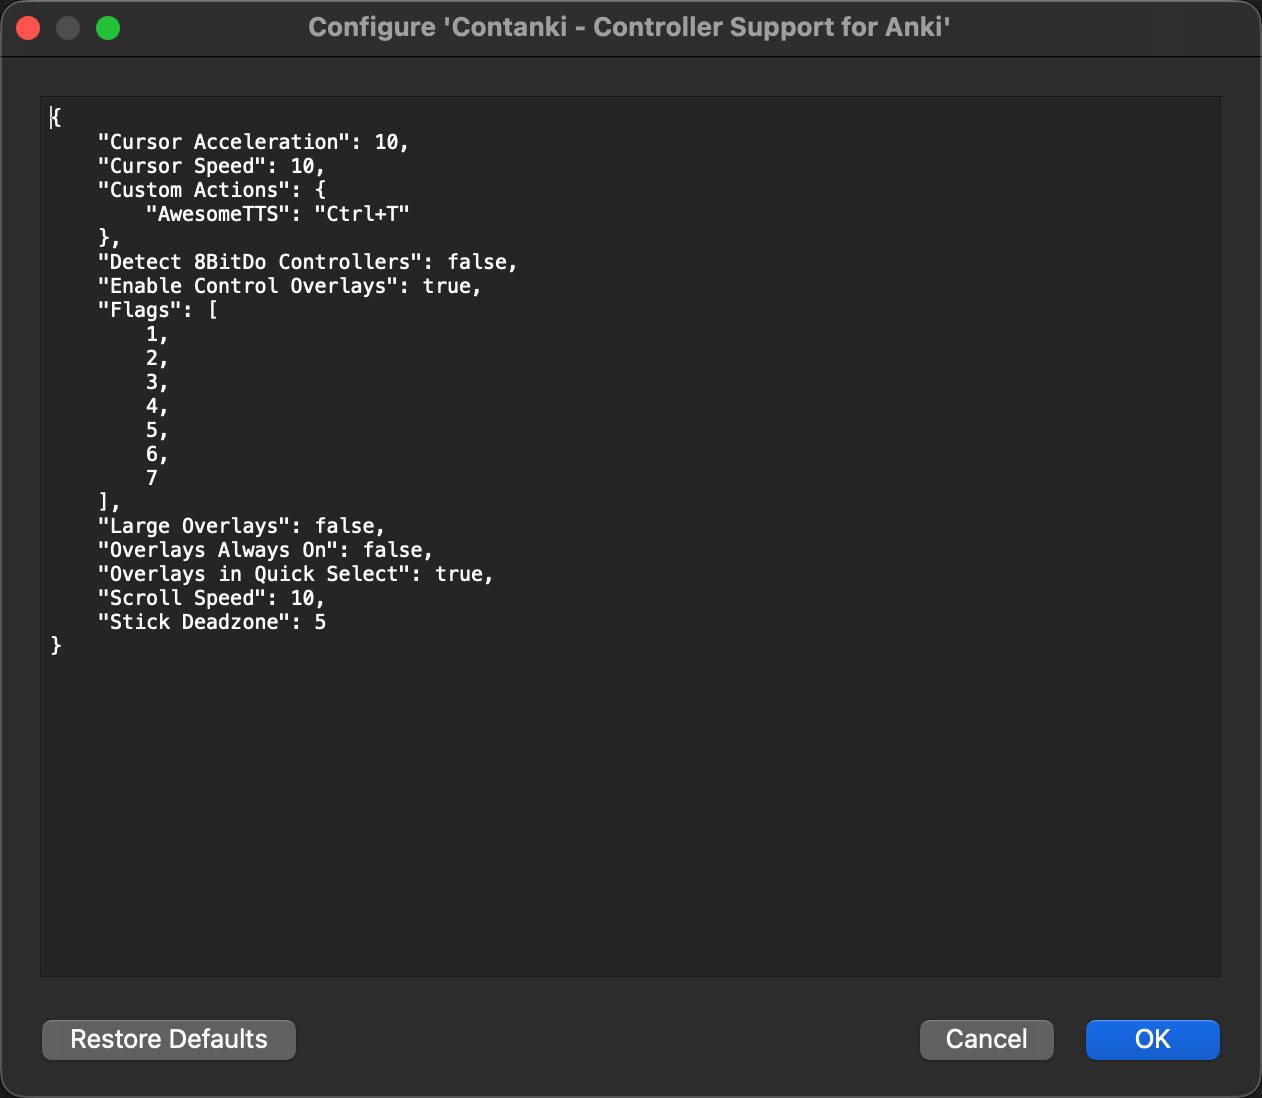
The overlay is genuinely useful, but for a heads-down review session you'll want the four grades and Show Answer on the face buttons so you never look down. Open Contanki's config dialog (Tools → Contanki) and reassign per context — Contanki keeps separate mappings for review, deck browser, and preferences, so a review-only layout won't fight your browsing layout. Save it as a profile you can export and reuse on another machine.
A sane review layout: A/✕ → Good, B/◯ → Again, X/☐ → Hard, Y/△ → Easy, and a shoulder button → Show Answer. Leave the sticks on their defaults for the rare time you need the mouse.
8BitDo: the one gotcha
8BitDo pads must be in X-input mode for Contanki to read them cleanly. Turn the controller on with its X-mode combo (check your model's manual — it's usually a Start + X style hold), then if Anki still doesn't see it, run Tools → Controller Options → Detect 8BitDo Controllers. That single toggle fixes the large majority of "my 8BitDo won't connect" reports.
macOS notes and troubleshooting
Contanki runs the same on macOS as elsewhere, with a couple of Mac-specific things worth knowing:
- On a Mac? The full pairing combos and the fix for "won't connect" live in the dedicated connect an Anki remote to Mac guide.
- Volume control from the pad only works on macOS — a nice bonus if you review with audio cards.
- Controller not detected? Press any button first (Contanki sleeps until it sees input). For 8BitDo, confirm X-mode and use Detect 8BitDo Controllers.
- Drops out after connecting other Bluetooth gear? Reconnect the controller — only one controller can be active at a time, and pairing something else can bump it.
Known limits, so you're not surprised: the add-on can't click title/menu bars or anything outside the Anki window, browser and preferences support is partial, and it can't open the webview's right-click menu. For plain reviewing none of that matters.
Reviewing on iPhone or iPad
Contanki is desktop-only, and here's the catch that trips people up: AnkiMobile accepts the small 8BitDo pads only in one specific mode. AnkiMobile reads Apple's GCExtendedGamepad profile, which the Zero 2 exposes in Mac mode (A+START, D-pad set to digital) and the Micro in S mode — in Switch, D-input or keyboard mode the exact cheap controllers people buy for Anki work great on desktop and silently do nothing in AnkiMobile. (Correction 2026-09-08: this post used to say they never work in AnkiMobile.)
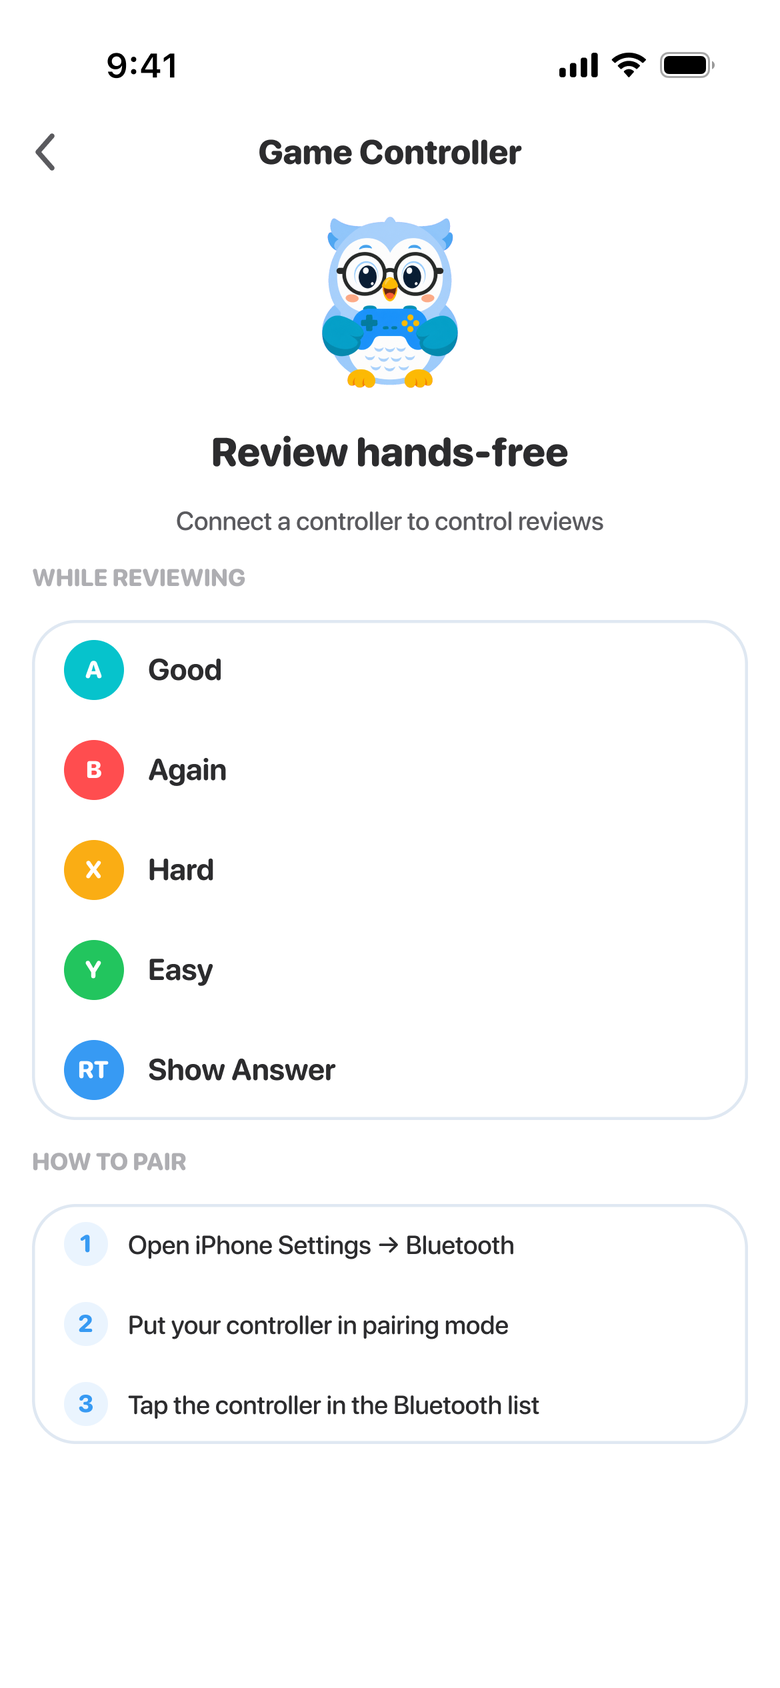
The fix is Keyboard Mode: switch the 8BitDo to Keyboard Mode so it sends key presses instead of gamepad events, and use an app that forwards those keys to your reviews. The Guru Anki Remote listens for both GCExtendedGamepad and GCKeyboard events (what Keyboard Mode sends) and forwards the matching grade to desktop Anki over Wi-Fi — so the pads AnkiMobile rejects suddenly drive your reviews.
Full walkthrough, including the models that need the bridge, is in the 8BitDo for Anki setup guide and the free wireless Anki remote comparison.
Contanki vs a dedicated remote vs your phone
You don't strictly need a gamepad at all — three honest options:
- Contanki + a controller you own — free (minus the pad), the most control on desktop, nothing to buy if a PS4/Xbox pad is already around.
- A dedicated hardware remote (StudyRemote and similar) — purpose-built, tiny, but it's another thing to buy and charge for one job.
- Your phone as the remote (Guru) — nothing extra to buy, works with the cheap 8BitDo pads AnkiMobile won't take, and drives desktop Anki over Wi-Fi. Best if you review across phone and desktop.
FAQ
Is Contanki free? Yes — it's free and open-source (LGPL). The only cost is the controller itself, and any recent Xbox/PlayStation/Switch/8BitDo pad works.
Do I need Contanki and the Guru remote? No. Contanki drives desktop Anki directly from a controller plugged into the computer. Guru is for when the controller is on your phone and you want it to drive desktop Anki. Pick whichever matches where your controller is.
My 8BitDo won't connect — what's wrong? Almost always X-mode. Turn the pad on in X-input mode, then run Tools → Controller Options → Detect 8BitDo Controllers.
Will a controller work directly in AnkiMobile on iPhone? Full-size MFi controllers will; the small 8BitDo models (Zero 2 / Micro) will too, once they are in Mac mode (Zero 2, digital D-pad) or S mode (Micro). Bridging through Keyboard Mode is the way around it.
Review Anki hands-free on iPhone
Bridge a cheap controller through the free Guru Anki Remote — nothing to install or map on the Mac.
Set up the Anki Remote